In-place archive mailbox comes with Office 365 enterprise license versions and also known as online archive mailbox. It provides extra cloud space in Exchange online where user can store their valuable data. With the archiving mailbox enabled, it terminates the personal mailbox and allows you to transfer all mails to the archive. Keep reading to know about “how to create archive mailbox in Office 365″ or “How to increase mailbox size in Office 365”.
Why Need to Enable Archive?
When your primary mailbox is nearly or about to full, it is better for you to transfer old and historical mails to the online archive mailbox. If you do not do daily work on Office 365 or you are a single user, then 50 GB is enough space for you. But this place is short for any enterprise or organization therefore it stores client data, meeting arrangements, important mails, orders and many other things. Therefore, it is necessary to expand Office 365 mailbox size.
Know the key point of “Office 365 Archive Mailbox” before proceeding
- You must know the administrator account detail.
- It works on on-premise archive folder for Outlook.
- Before start the procedure, you need to assign the permission.
- The user archive mailbox should not be older than exchange online version. So when you change Exchange online in any version, at the same time, you must move the archive mailbox as well.
- It provides 100 GB additional space. When archive mailbox reaches its final point of view, Organization can contact to Microsoft for additional space.
How to enable or create archive mailbox in Office 365
Keep an eye on the key points and follow the steps below to create archive mailboxes in Office 365.
(a). Log in to Office 365 admin.
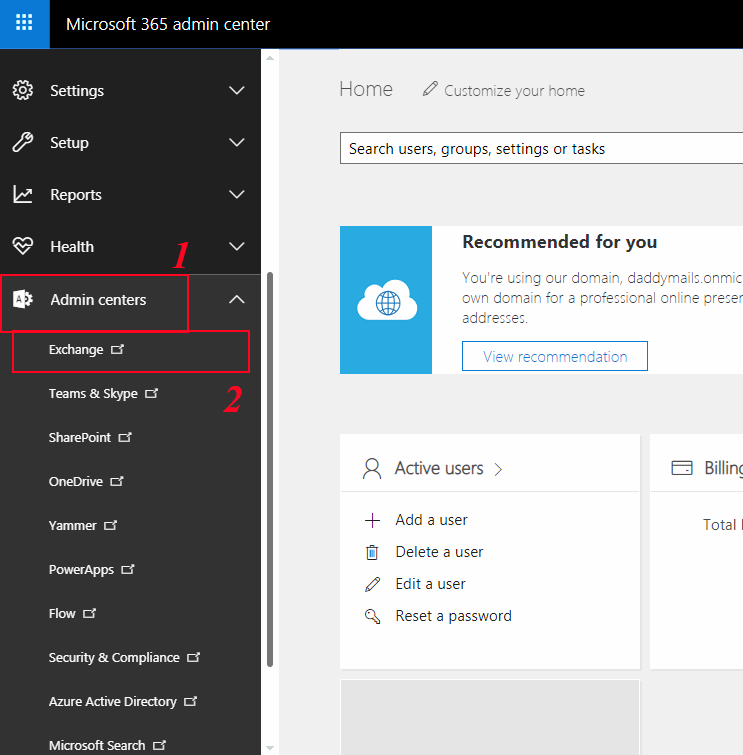
(b). Go to the admin center and choose Exchange.In exchange, you turn to welcome page >> switch to “Recipients”.
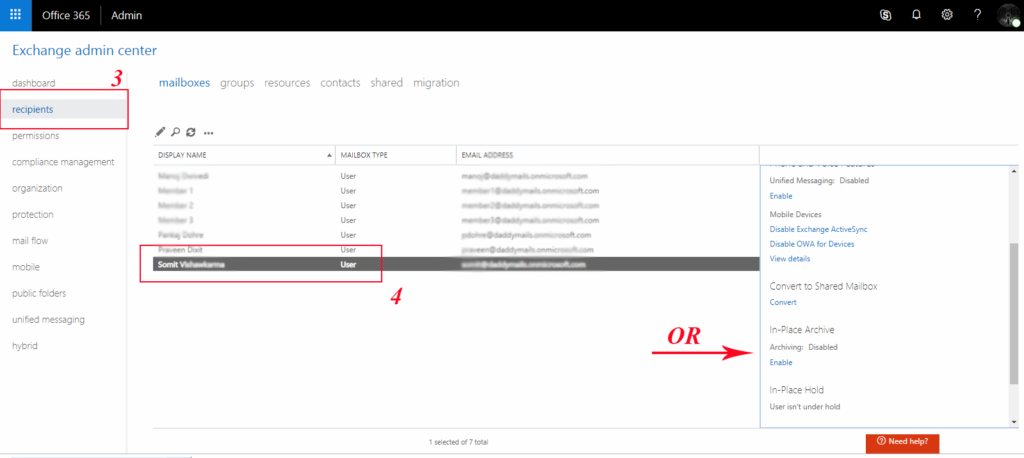
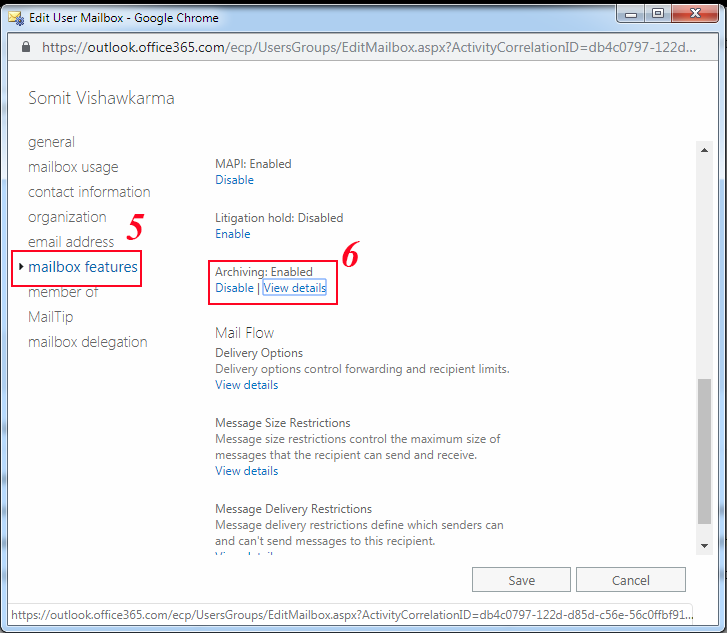
(c). Double click on desired name and scroll down to enable the archive mailbox OR you can also enable the in-archive mailbox from recipient’s page.
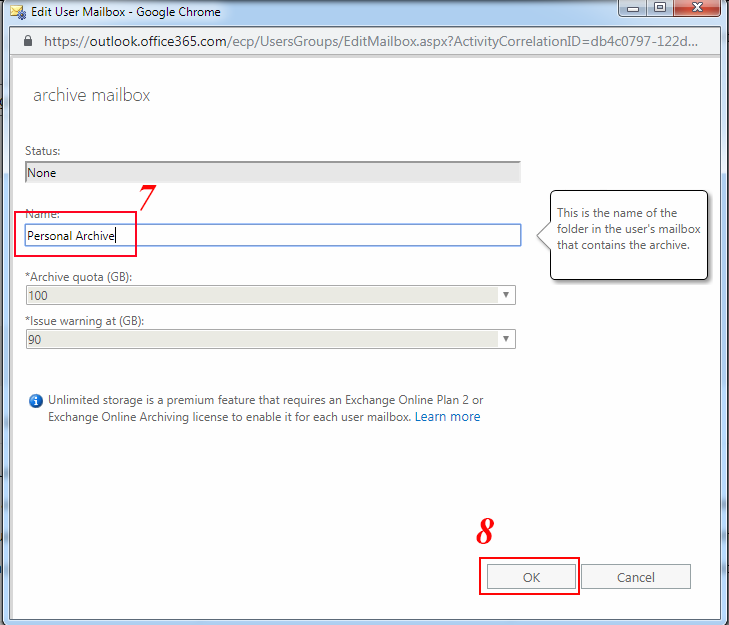
(d). Now click on view detail >> put the name as I wrote “Personal Archive” then click on Ok and save. (Note: you can increase archive mailbox quota if you pay extra)
(e). To make a proper archive folder we need to add retention policy so we go to “Compliance Management” then click on “Retention Policy”.
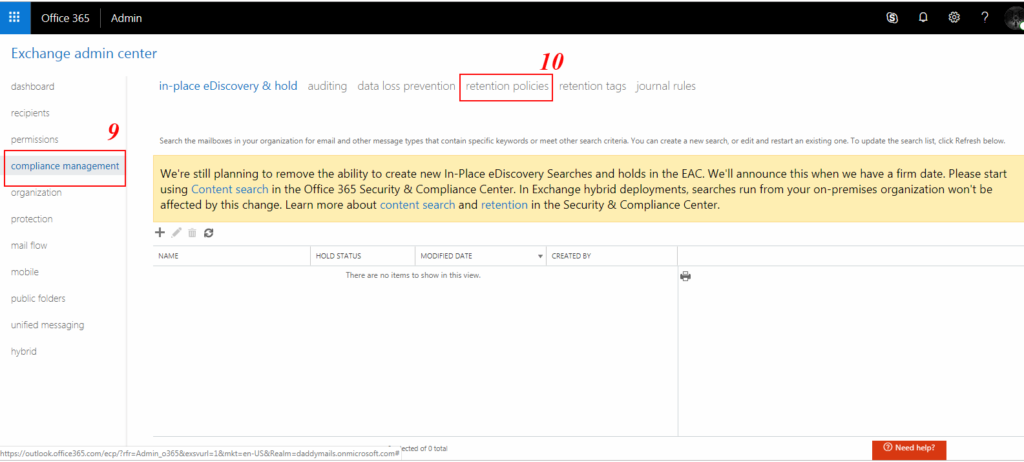
(f). In this section, we will see the default policy, where nothing has been done for archiving. So click on “+” sign to add a new policy.
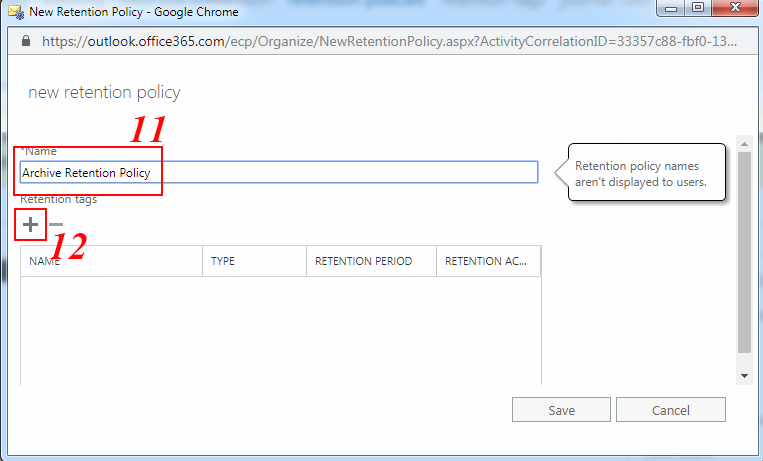
(g). Wrote any name of the policy and hit “+” sign to set the rules for archive mailbox. It will be moved mails at certain period from personal to archive. After that click on Ok and save.
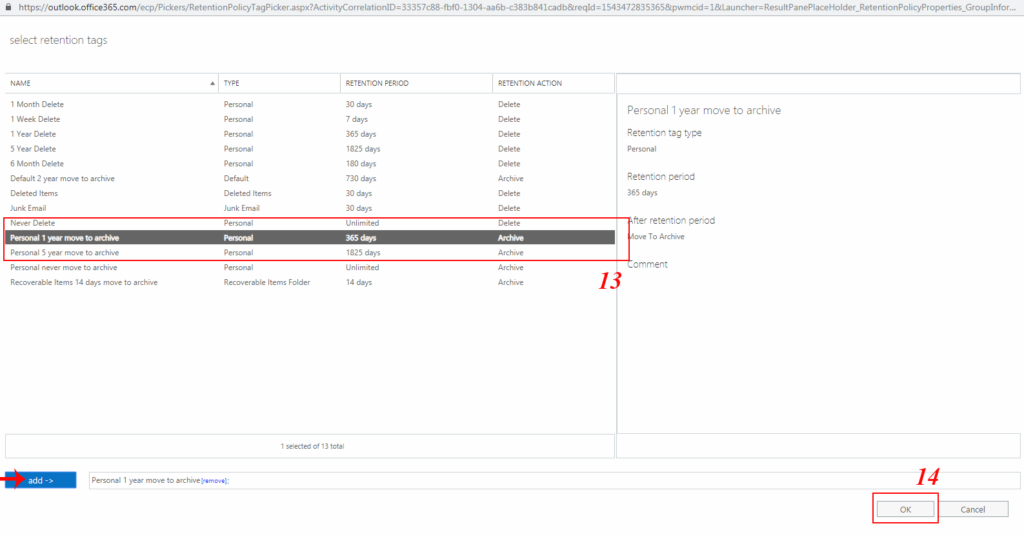
(h). Now go back to under recipient option >> Double click on that user, in which you want to create an archive mailbox.
(i). Click mailbox featured option and adds retention policy.
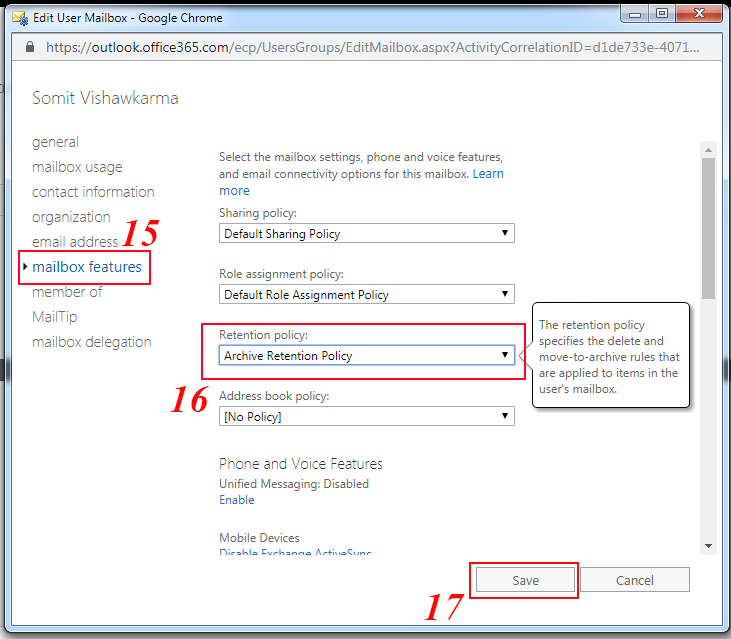
We have completed all the steps now wait 10 to 15 minutes to view the archive mailbox in the Outlook interface. It also depends on the speed of the Microsoft server connection.
When you login back to your Outlook email, you will see the archive folder. If it is empty that means you don’t have any email older than one year.
Is there any way to import MBOX file to Archive mailbox directly ?
Yes! After creating a personal archive, you can easily migrate MBOX file to Archive mailbox without any hassle. We have upgraded tool features, which is fully capable to export MBOX data to Office 365 archive mailbox directly. Therefore, we suggest adopting MBOX to Office 365 migration tool to upload MBOX to in-place archive mailbox of Exchange online.
Verdict: In this helpful post, we described “how to create archive mailbox in Office 365” with key points and retention policy. Do as I showed you in the text and pictures to take benefits of Office 365 archive mailbox. If you have any doubt or query then you leave a message.
